When it comes to maintaining your Roto F ceiling fan, one of the simplest tasks you may encounter is replacing the light bulb. This is not just a routine maintenance task; it’s essential to ensure that your fan continues to function correctly and provides optimal lighting in your room. Roto F ceiling fans are known for their modern design, durability, and functionality, but like all appliances, their light bulbs can burn out over time. This guide will walk you through the process of replacing the light bulbs in your Roto F ceiling fan with ease, ensuring that you can enjoy reliable light and an aesthetically pleasing ceiling fan for years to come.
Why Should You Replace the Light Bulb in Your Roto F Ceiling Fan?
The most obvious reason to replace the light bulb in your Roto F ceiling fan is that the bulb has burned out. Over time, light bulbs naturally wear out and cease to function. Replacing the bulb allows you to maintain the brightness and functionality of the fan’s light fixture. However, there are other reasons you might want to replace the bulb in your ceiling fan. For example, if you’re updating your home’s decor and want a different type of lighting, or if you simply want a more energy-efficient bulb, replacing the bulb in your Roto F fan can provide you with those opportunities.
Additionally, it’s important to replace the light bulb in your Roto F fan if you notice flickering, dim lighting, or difficulty turning the light on. These could be signs that the bulb is nearing the end of its life and needs to be replaced to restore proper function to your ceiling fan.
Types of Light Bulbs for Roto F Ceiling Fans
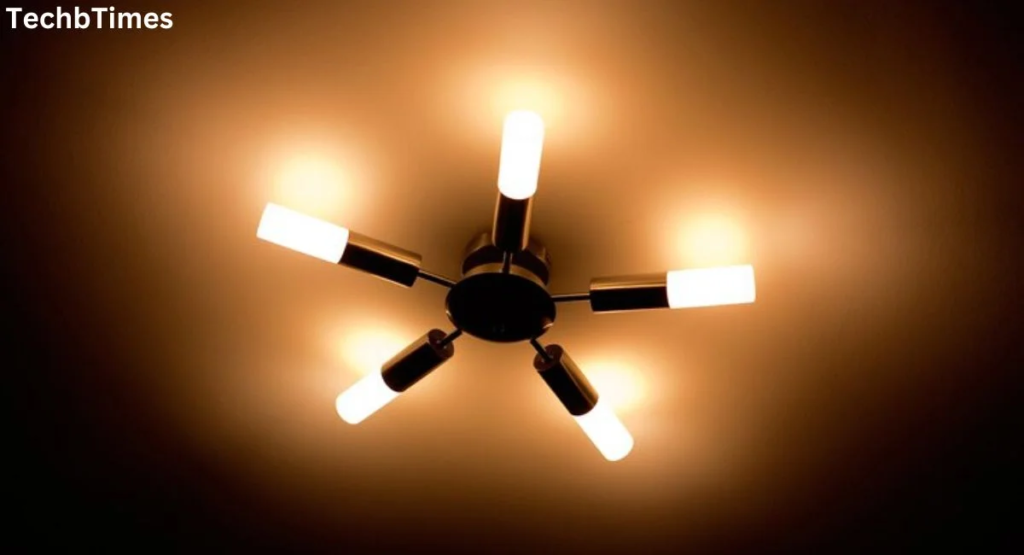
Before beginning the replacement process, it’s important to understand the different types of light bulbs that can be used in Roto F ceiling fans. Roto F ceiling fans generally use either standard incandescent bulbs, CFL (compact fluorescent lamps), or LED bulbs, though the specific type may depend on the model of your fan. When choosing a light bulb replacement, it’s essential to match the correct bulb type to your fan’s light fixture for compatibility and safety.
- Incandescent Bulbs: These are the traditional light bulbs, and they provide a warm, yellowish glow. They are relatively inexpensive, but they are less energy-efficient compared to other options. You can still find incandescent bulbs for ceiling fans, but they are becoming less common as energy-efficient alternatives like LEDs take over the market.
- CFL Bulbs: Compact fluorescent lamps are more energy-efficient than incandescent bulbs. They are a great option for those looking to save on electricity bills. They are usually spiral-shaped and emit a cooler, white light. These bulbs tend to last longer and consume less energy but take a little longer to reach their full brightness when turned on.
- LED Bulbs: Light-emitting diodes (LED) are the most energy-efficient option available today. These bulbs are incredibly long-lasting, use very little energy, and provide a bright light with a variety of color temperatures. LEDs are becoming the go-to choice for ceiling fans due to their durability and energy efficiency.
When purchasing a replacement bulb for your Roto F ceiling fan, it’s crucial to check your fan’s manual or look at the existing bulb to ensure compatibility. If you’re unsure about the type, you can always visit a local hardware store or consult an expert who can recommend the correct bulb.
Preparing for the Roto F Ceiling Fan Light Bulb Replacement
Before you start the replacement process, it’s important to ensure you have the proper tools and take the necessary precautions to safely replace the bulb. Here are the steps to prepare:
- Turn Off the Power: The most important step in any ceiling fan repair is to turn off the power to avoid any electrical hazards. You can either flip the light switch that controls the fan or, for added safety, turn off the circuit breaker that powers the ceiling fan. Always double-check that the fan is not receiving power before proceeding with the replacement.
- Gather the Necessary Tools: In most cases, replacing the light bulb in your Roto F ceiling fan will only require basic tools. You will need a sturdy step ladder to reach the ceiling fan safely, a new bulb of the appropriate type and wattage, and possibly a screwdriver if the fan’s light fixture is secured with screws.
- Inspect the Ceiling Fan: Before removing the light bulb, take a moment to inspect the ceiling fan’s light fixture. Look for any signs of damage, such as broken wires, cracks, or loose components. If you notice any of these issues, you may want to call a professional electrician to handle the repair or replacement of parts. However, if the bulb is the only issue, you can proceed with the replacement process.
How to Replace the Light Bulb in a Roto F Ceiling Fan
Once you’ve gathered your tools and prepared the area, you’re ready to replace the light bulb in your Roto F ceiling fan. The process is straightforward and can typically be completed in just a few steps.
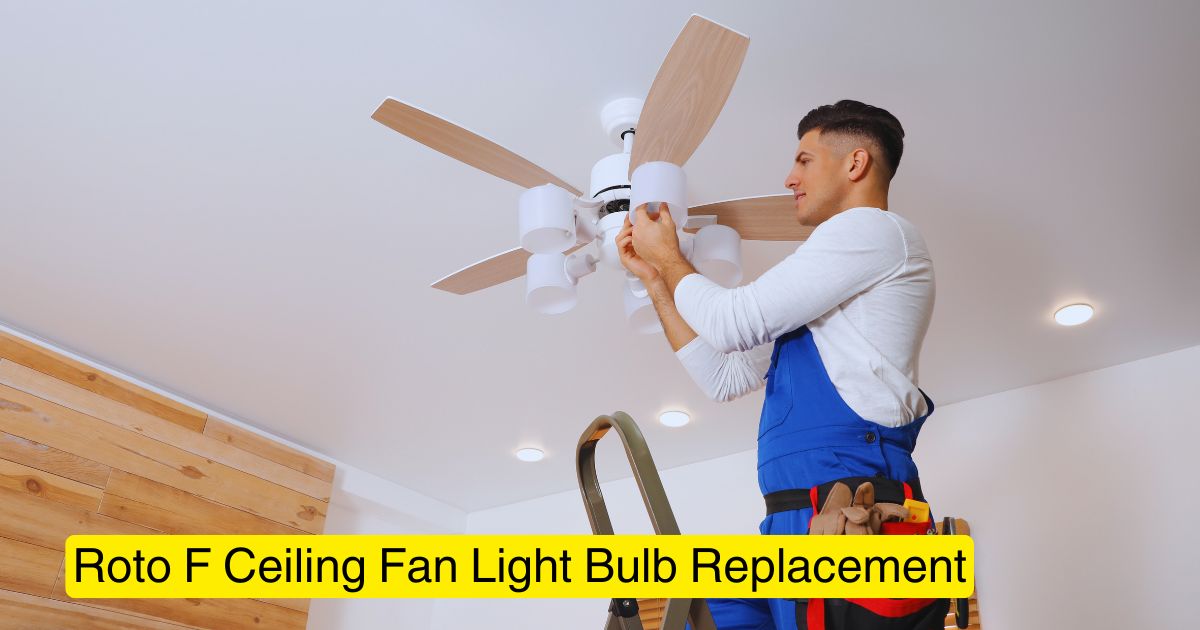
- Use a Step Ladder: Place a sturdy step ladder under your Roto F ceiling fan so you can reach the light fixture comfortably. Make sure the ladder is positioned securely to avoid accidents.
- Remove the Light Fixture Cover: Many Roto F ceiling fans feature a glass cover or shade that protects the light bulb. Depending on your model, this cover may be secured with screws or simply screwed on by hand. If screws are present, use a screwdriver to remove them. If it’s a twist-off cover, turn it counterclockwise to remove it. Once the cover is off, set it aside in a safe location.
- Remove the Old Bulb: After removing the light fixture cover, you’ll be able to see the light bulb. For most Roto F ceiling fans, the bulb is threaded into a socket, much like a standard light bulb in any household lamp. Simply grip the bulb firmly and twist it counterclockwise to remove it. If the bulb is stuck or difficult to remove, try gently wiggling it back and forth as you twist. Be cautious not to apply excessive force, as this could break the bulb or damage the fixture.
- Install the New Bulb: Take your new replacement bulb and carefully screw it into the light socket in the same manner you removed the old one. Turn it clockwise until it’s securely in place. Make sure the bulb is snug but not overtightened, as this could cause damage to the socket.
- Replace the Light Fixture Cover: Once the new bulb is installed, replace the light fixture cover. If your fan has a screw-on cover, simply align it with the fixture and twist it clockwise until it’s secure. If the cover was held in place with screws, reinsert the screws and tighten them with a screwdriver.
- Turn the Power Back On: After ensuring everything is securely in place, turn the power back on by flipping the light switch or switching the circuit breaker back to the “on” position. Test the new light bulb to make sure it works properly. If the light doesn’t turn on, double-check that the bulb is properly installed and that the power is restored.
Troubleshooting Tips

If you encounter any issues with the light not turning on after the bulb replacement, here are some troubleshooting tips:
- Check the Bulb Socket: Sometimes the issue lies not with the bulb but with the socket itself. If the socket is damaged or corroded, it may not be making proper contact with the bulb. Inspect the socket for any visible damage or wear and tear.
- Ensure Proper Wattage: Make sure that the bulb you’ve installed is the correct wattage for your ceiling fan. If the bulb is too high-wattage for the fixture, it could cause electrical problems or even pose a fire hazard.
- Examine the Wiring: If the bulb still doesn’t light up, there may be an issue with the wiring. In this case, it’s best to consult a professional electrician to safely inspect and repair the wiring.
- Try a Different Bulb: If you suspect the bulb you installed is defective, try replacing it with another new bulb to see if that resolves the issue.
When to Call a Professional
While replacing a light bulb in your Roto F ceiling fan is usually a simple task, there are some cases where it’s best to call in a professional. If you experience persistent electrical issues, such as flickering lights, difficulty turning the light on, or problems with the fan’s operation, it may indicate a more complex electrical issue that requires professional attention. In such cases, it’s always better to err on the side of caution and contact a licensed electrician to inspect and repair the ceiling fan safely.
Conclusion
Replacing the light bulb in your Roto F ceiling fan is a simple and straightforward task that can improve the functionality of your fan and restore proper lighting in your room. By following the steps outlined in this guide, you can easily replace the bulb yourself and keep your ceiling fan in good working condition. Remember to choose the right bulb for your fan, turn off the power before starting, and handle all components with care to ensure a smooth and safe replacement process. With a little bit of effort, you’ll be able to enjoy bright, efficient lighting in your home once again.